![]()
Note: unless explicitly stated otherwise, the term click means "click with the Left mouse button."
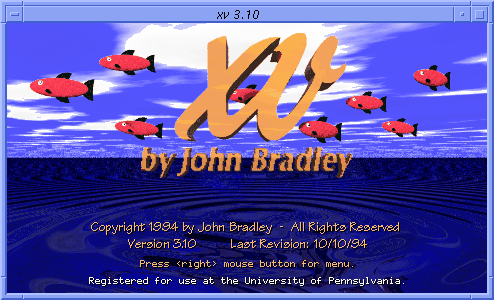
Start the program up by typing ' xv '. After a short delay, a window will appear with the default image (the xv logo, credits and revision date) displayed in it. If you change the size of the window (using whatever method your window manager provides), the image will be automatically stretched to fit the window.
Clicking (and optionally dragging) the Middle mouse button inside this window will display pixel information in the following format:
196, 137 = 191,121,209 #bf79d1 (287 42 81 HSV) [ 0, 0]
The first pair of numbers (196,137) are the x and y positions of the cursor, in image coordinates. These numbers remain the same regardless of any image resizing, or cropping; a 320x200 image remains a 320x200 image, regardless of what size it is displayed on the screen.
The first triplet of numbers (191,121,209) are the RGB values of the selected pixel. The components will have integer values in the range 0-255. The values displayed are prior to any HSV/RGB modification, but after any colormap changes. See "The Color Editor" for details.
The next item is a six-digit value expressing the RGB values of the selected pixel in hex, in the #rrggbb format. This is the same format used to specify colors to other X programs, which may be useful.
The second triplet of numbers (287 42 81) are the HSV values of the selected pixel. The first component will have integer values in the range 0-359, and the second and third components will have integer values in the range 0-100. The values displayed are prior to any HSV/RGB modification, but after any colormap changes. See "The Color Editor" for details. Also, see "RGB & HSV Colorspaces" for more information about what these numbers mean.
Finally, the last pair of numbers is the distance (dx, dy) between the current mouse position and where the mouse was originally clicked.
Note: If you actually want to measure some pixels, it will probably help to zoom in on a the relevant portion of the image, to the point that you can see the individual pixels. See "Zooming" below.
Note: This also sets the 'current color' value used by various painting tools. (See "Image Editing" .)
This string is automatically copied to your X server's cut buffer whenever you measure pixel values. This lets you easily feed this information to another program, useful if you're doing manual feature extraction, or something. Try it: measure a pixel's value, and then go click your Middle mouse button in an xterm window.
Bring up the xv controls window by pressing the ? key or clicking the Right mouse button inside the image window.
Clicking and dragging the Left button of the mouse inside the image window will allow you to draw a selection rectangle on the image. If you're unhappy with the one you've drawn, simply click the Left button and draw another. If you'd like the rectangle to go away altogether, click the Left button and release it without moving the mouse.
Double-clicking the Left button inside the image window will create a selection rectangle the size of the currently displayed area of the image, or remove the previous selection as appropriate.
Once a selection rectangle has been drawn, it can be fine-tuned by clicking and dragging any of the handles that appear on its edge. If you press the <Shift> key while dragging a handle, the selection rectangle is kept square. If you press the <Ctrl> key while dragging a handle, the selection rectangle maintains the same aspect ratio it originally had.
You can move the selection rectangle by Left-clicking inside it and dragging it around. Pressing the <Shift> key while doing so will constrain the motion to the horizontal and vertical axes.
You can determine how large the selection rectangle is (in image coordinates) by bringing up the xv info window. Do this selecting Image Info from the Windows menu xv controls window or by pressing the i key inside any open xv window.
The xv info window will display, among other things, the current size and position of the selection rectangle in terms of image coordinates. For example, if it says:
114x77 rectangle starting at 119,58
it means that the current selection rectangle is 114 image pixels wide, 77 image pixels high, and that its top-left corner is located 119 image pixels in from the left edge of the image, and 58 image pixels in from the top edge. These values will be updated as you drag the cropping rectangle around.
If you want to set the size or position of the selection rectangle precisely, you can use the arrow keys on your keyboard. First, make the xv info window visible as described above. Second, use the mouse to draw a rough approximation of the selection rectangle that you want. You can now use the arrow keys to move the selection rectangle around the image. Once you've gotten the top and left sides of the selection rectangle precisely where you want them, you can move the bottom-right corner of the selection rectangle by holding the <Shift> key down while using the arrow keys. Pressing the up arrow will make the rectangle shorter, and pressing the down arrow will make the rectangle taller.
Once you have a selection rectangle that you can live with, you can proceed with the actual cropping operation. Click the Crop button in the xv controls window, or press the c key in any open xv window. The image window will shrink to show only portions of the image that were inside the cropping rectangle.
Note: if you are running a window manager such as mwm, which decorates windows with a title bar, resizing regions, and such, it is quite possible that the aspect ratio of the cropped image will get screwed up. This is because certain window managers enforce a minimum window size. If you try to crop to a rectangle that is too small, the window manager will create the smallest window it can, and the image will be stretched to fit this window. If this happens, you can press the Aspect button in the xv controls window, or press the a key in any open xv window. This will expand the image so that it will once again have the correct aspect ratio. (Also, see the ' -nodecor ' option, in "Miscellaneous Options".)
You can crop a cropped image by repeating the same steps (drawing a new selection rectangle and issuing the Crop command), ad infinitum.
You can return to the original, uncropped image by using the UnCrop command. Simply click the UnCrop button or press the u key in any open xv window. Note that using the UnCrop command will turn off image smoothing (the Smooth command), due to the potentially long time it can take to generate a large, smoothed image.
Note that if you try to make the selection rectangle too small in either width or height (under 5 screen pixels), it'll just turn itself off. If you want to crop a very small portion of an image, you'll probably have to do it in two passes. First, crop to a smallish rectangle, expand that image, then crop again.
You can also fine-crop the image by pressing the <Ctrl> key and one of the arrow keys. This will crop off one pixel from the edge of the image, based on the arrow key pressed. The Up key moves the bottom edge up one pixel, the Down key moves the top edge down one pixel, and so on.
You can Zoom In by a factor of two (or four, or eight, etc.) on any rectangular region of the image by holding down the <Ctrl> key on your keyboard and clicking the Left mouse button in the image window. A rectangle will appear, centered around the cursor position, showing you what portion of the image will be expanded. Move the rectangle as you see fit, release the mouse button, and the region inside the rectangle will be redrawn at twice its previous size. The image window should remain the same size. You can repeat this operation to zoom in by a factor of four, or eight, or whatever, as many times as you wish.
While zoomed-in, you can Pan the image around by holding down the <Ctrl> key, clicking the Middle mouse button in the image window, and dragging it around. A rectangle will appear around the mouse, indicating where the currently-displayed portion of the image will be moved to.
You can Zoom Out by a factor of two (if possible) by holding down the <Ctrl> key and clicking the Right mouse button inside the image window. You can not zoom out beyond the point where the entire image fills the window.
xv now has the ability to display multi-page image files, though currently this is only implemented for PostScript files (using the ghostscript interpreter). If you are viewing a multi-page document, a "page n of m" string will be added to the xv image window's title bar.
You can walk through the document by pressing the <PageUp> and <PageDown> keys on your keyboard (they may be labeled <Prev> and <Next>' instead) while the keyboard focus is on the xv image window. Pressing <Shift-Up> and <Shift-Down> may also work.
You can also jump directly to any given page by typing 'p' into the xv image window. This will pop up a dialog window which will ask you what page you'd like to go to.
xv now features a number of rudimentary image-editing tools. While it isn't about to compete with Adobe's PhotoShop anytime soon, you may still find what it does to be of some use. You now have the ability to do pixel-editing, freehand 'scribbling', line drawing, and pixel-level 'smudging'. Also, xv now supports cut, paste, copy, and clear of rectangular selections, as described in "Image Cut and Paste Commands" . Also, xv now has a 'text annotation' tool, described in "Text Annotation" .
The major weakness: the various drawing tools listed above can only draw in colors that already exist in the image. At this time, these tools (and xv) are primarily focused on the 'image editing' job, rather than on the 'arbitrary paint program' job. Needless to say, there's still a way to paint in whatever color you'd like. It's just a matter of getting the desired color(s) into the picture. The best way is probably to use the Pad command (see "The Pad Command").
All of the following drawing commands use the concept of the 'current color'. The current color is set by using the Middle mouse button in the image window to 'pick up' the desired color.
You can edit individual pixels by doing a shift-middle-click with the mouse. (Hold a <Shift> key, and Middle-click somewhere in the image window.) The selected pixel will change to the desired color. It will probably help to zoom in on the relevant section of the image first. Anyway, if you drag the mouse around, you will be able to draw arbitrary 'scribbles' all over the image. This probably isn't desirable, so be careful!
You can also draw straight lines by holding down the <Ctrl> key along with the shift-middle combination.
You can 'smudge' specific areas of the image by doing a shift-right-click with the mouse, in the image window. The clicked-on pixel will be replaced with the average color of the 9 pixels in the 3x3 square centered on said pixel. This can be used to manual edit out 'salt and pepper' noise. It can also be used to soften edges. As with the pixel editing tool, you can drag the 'smudger' around.
Note: This only works in '24-bit' mode. If you are viewing an 8-bit image, it will be automatically converted up to a 24-bit version of itself.
Note: While this tool is similar to the Blur and DeSpeckle algorithms, those algorithms operate on every pixel in a rectangular region, whereas this tool operates only on those pixels that you click or drag on.
![]()